Welcome to the world of flyer design with Coreldraw! Whether you’re a seasoned designer or just starting out, this comprehensive guide will provide you with the essential knowledge and techniques to create eye-catching and effective flyers. Join us as we delve into the fundamentals of flyer design, explore the user-friendly CorelDRAW interface, and discover the secrets of typography, image selection, and color theory.
From understanding the principles of visual hierarchy to mastering special effects, this guide will empower you to design flyers that leave a lasting impression. So, grab your design hat and let’s embark on a journey of creativity and impact!
Flyer Design Fundamentals
Flyers are a classic and effective way to promote your business or event. But what makes a flyer effective? Here are a few principles of effective flyer design:
Visual Hierarchy
Visual hierarchy is the arrangement of elements on a page to create a sense of importance. The most important elements should be the most prominent, and the less important elements should be less prominent. You can create visual hierarchy using a variety of techniques, such as:
- Size: Larger elements are more important than smaller elements.
- Color: Bright colors are more attention-grabbing than dull colors.
- Contrast: Elements that contrast with their surroundings are more noticeable.
- Placement: Elements that are placed in the center of a page are more important than elements that are placed on the sides.
White Space
White space is the empty space around elements on a page. It can be used to create a sense of balance and to make elements more readable. Too much white space can make a flyer look empty, but too little white space can make a flyer look cluttered.
Examples of Well-Designed Flyers
Here are a few examples of well-designed flyers:
- The flyer for the event “Design Week” uses a bold headline and bright colors to create a sense of excitement.
- The flyer for the product “The New iPhone” uses a simple design with a focus on the product’s features.
- The flyer for the service “Dog Walking” uses a friendly and inviting design to create a sense of trust.
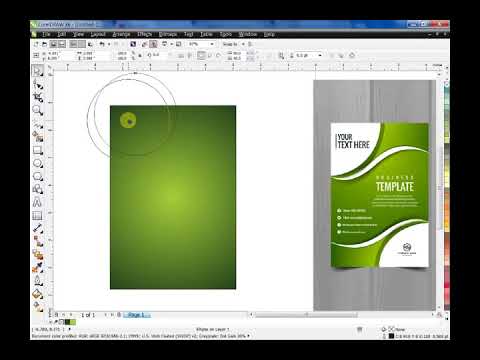
CorelDRAW Interface for Flyer Creation
The CorelDRAW interface provides a comprehensive workspace for creating professional-looking flyers. Let’s take a guided tour of the key tools and features you’ll need for flyer design.
When you open CorelDRAW, you’ll be greeted by a workspace consisting of a menu bar, toolbars, property bars, and a drawing window. The menu bar at the top of the screen provides access to all of CorelDRAW’s features and functions.
The toolbars contain icons that represent the most commonly used tools for creating and editing objects. The property bars provide options for customizing the appearance and behavior of the selected object.
The drawing window is where you’ll create and edit your flyer. It’s a large, blank canvas where you can add text, images, and other elements to create your design.
Setting Up a New Flyer Document
To create a new flyer document, click on the “File” menu and select “New.” In the “New Document” dialog box, select the “Flyer” template. This will create a new document with the standard flyer dimensions and settings.
You can also customize the document settings to match your specific needs. For example, you can change the page size, orientation, and color mode.
Text and Typography in Flyers

Text and typography play a crucial role in creating impactful flyers. The right font choices, effective headlines, and well-organized body copy can elevate your message and capture attention.
Choosing Fonts
Consider the tone and style of your flyer when selecting fonts. Sans-serif fonts like Helvetica or Arial are clean and modern, while serif fonts like Times New Roman or Georgia convey a sense of tradition and elegance. Choose fonts that complement the flyer’s overall design and message.
Creating Effective Headlines
Headlines are the first thing people will see, so make them attention-grabbing and informative. Keep them concise, using strong verbs and specific details. Consider using a larger font size and contrasting colors to highlight the headline.
Organizing Text
Organize your text into logical sections using headings, subheadings, and bullet points. Use white space effectively to create a clean and readable layout. Consider using columns or boxes to break up large blocks of text and guide the reader’s eye.
Image Selection and Placement
Images are a powerful tool that can enhance the message of your flyer and make it more visually appealing. When choosing images, it’s important to consider how they will complement the text and overall design of your flyer.
Here are a few things to keep in mind when selecting images for your flyer:
Relevance
– Choose images that are relevant to the topic of your flyer. For example, if you’re creating a flyer for a music event, you might want to include images of the performers or the venue.
– Make sure the images you choose are high-quality and visually appealing. Blurry or pixelated images will make your flyer look unprofessional.
– Consider the size and shape of the images you want to use. Make sure they will fit well within the layout of your flyer.
– Use images to break up the text and make your flyer more visually appealing.
– Don’t overload your flyer with images. Too many images can make your flyer look cluttered and difficult to read.
Color Theory and Flyer Design
Color theory is a branch of art that studies how colors interact with each other and affect human perception. Understanding color theory can help you create visually appealing flyers that evoke the desired emotions and convey your message effectively.
The color wheel is a tool that helps you visualize how colors relate to each other. It consists of 12 colors: three primary colors (red, yellow, and blue), three secondary colors (green, orange, and purple), and six tertiary colors (yellow-green, blue-green, blue-violet, red-violet, red-orange, and yellow-orange).
Choosing Colors
When choosing colors for your flyer, consider the following factors:
- The purpose of your flyer: Different colors evoke different emotions. For example, red is often associated with excitement and passion, while blue is associated with calmness and serenity.
- Your target audience: The colors you choose should appeal to your target audience. For example, if you’re targeting young people, you might want to use bright and vibrant colors.
- Your brand identity: If you have an established brand, you should use colors that are consistent with your brand identity.
Color Palette
Once you’ve considered the factors above, you can start to create a color palette for your flyer. A color palette is a set of colors that work well together. Here are a few tips for creating a color palette:
- Use a limited number of colors: Too many colors can be overwhelming and distracting. Stick to a maximum of three or four colors.
- Use contrasting colors: Contrasting colors create visual interest and make your flyer stand out. For example, you could use a dark blue background with bright yellow text.
- Use complementary colors: Complementary colors are colors that are opposite each other on the color wheel. They create a high-contrast effect that can be very eye-catching.
Special Effects and Enhancements
Gradients
Gradients add depth and dimension to flyers by creating a smooth transition between two or more colors. To apply a gradient, select the object you want to apply it to and go to the “Fill” menu. In the “Fill” menu, select the “Gradient” option. You can then choose the colors you want to use and the direction of the gradient.
Drop Shadows
Drop shadows add depth and realism to flyers by creating the illusion of an object floating above the page. To apply a drop shadow, select the object you want to apply it to and go to the “Effects” menu. In the “Effects” menu, select the “Drop Shadow” option. You can then choose the color, size, and direction of the drop shadow.
Other Special Effects
Other special effects that can be used to enhance flyers include:
- Bevels and Embosses: Bevels and embosses add depth and dimension to objects by creating the illusion of a raised or recessed surface.
- Lens Flares: Lens flares add a touch of glamour to flyers by creating the illusion of light reflecting off an object.
- Textures: Textures add interest and variety to flyers by creating the illusion of a different surface.
Exporting and Printing Flyers

Exporting your flyer in the right format is crucial for high-quality printing. Common file formats for flyer export include PDF, JPG, PNG, and TIFF. PDF is the preferred format for professional printing as it preserves the original design and ensures accurate color reproduction. JPG is a lossy format that can result in reduced image quality, while PNG is a lossless format that supports transparency. TIFF is a high-resolution format suitable for large-scale printing.
When printing flyers, consider the paper type and resolution to achieve optimal results. Glossy paper provides a vibrant finish, while matte paper offers a more subtle and professional look. The resolution of your flyer should be at least 300 dpi (dots per inch) for sharp and clear prints.
To ensure high-quality printed flyers, follow these tips:
* Proofread your flyer carefully for any errors before exporting.
* Use high-resolution images and graphics to maintain clarity.
* Set the correct color profile for your printer to match the colors on your screen.
* Choose a reputable printing service that can deliver consistent and professional results.
FAQ Summary
What are the key principles of effective flyer design?
Effective flyer design revolves around visual hierarchy, white space, and a clear call-to-action. Use visual elements to guide the reader’s eye towards the most important information, while ample white space enhances readability and impact.
How do I choose the right fonts for my flyer?
Font selection is crucial for conveying the message and tone of your flyer. Consider the readability, legibility, and overall style of the font. Sans-serif fonts are generally recommended for headlines, while serif fonts work well for body text.
What are the best practices for image selection and placement?
Choose images that are relevant, high-resolution, and visually appealing. Use images to support your message and create visual interest. Experiment with different image compositions and placements to achieve a balanced and impactful design.
How can I use color theory to enhance my flyer design?
Color plays a significant role in evoking emotions and conveying messages. Understand the basics of color theory, including color schemes, harmonies, and contrasts. Use colors strategically to create a visually appealing and emotionally resonant flyer.
What are some tips for exporting and printing flyers?
When exporting your flyer, choose the appropriate file format based on your intended use. For printing, consider the paper type, resolution, and color profile to ensure high-quality printed flyers that accurately represent your design.